AirSense 10 User Guide
Setup
3. Setup
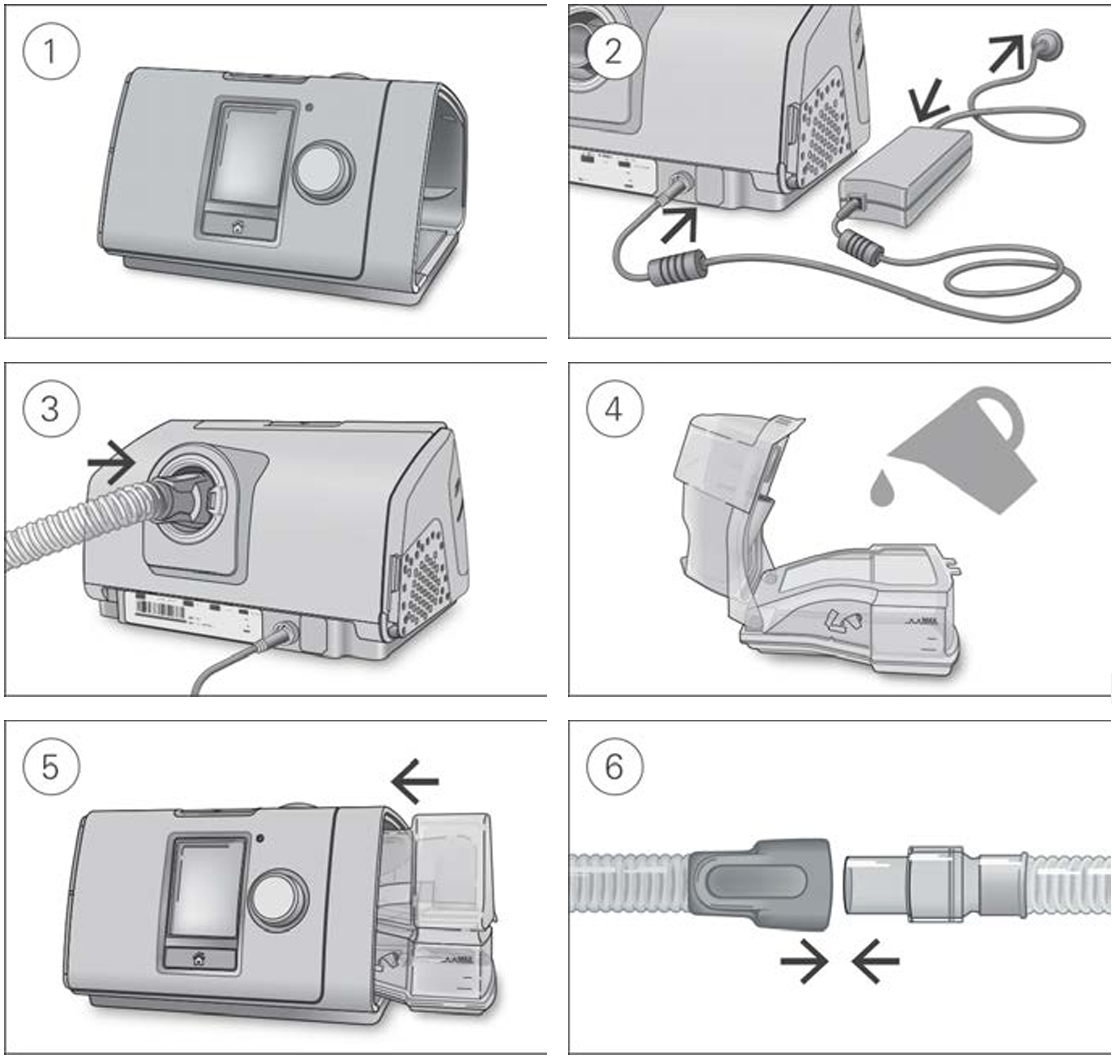
Setup steps
- Place the device on a stable, level surface.
- Plug the power connector into the rear of the device. Connect one end of the power cord into the power supply unit and the other end into a power outlet.
- Connect the air tubing firmly to the air outlet located on the rear of the device.
- Open the humidifier and fill it with water up to the maximum water level mark.
- Close the humidifier and insert it into the side of the device.
- Connect the free end of the air tubing firmly onto the assembled mask.
⚠️ CAUTION
Do not overfill the humidifier as water may enter the device and air tubing.
How to set up & use your new AirSense™ 10 CPAP machine from ResMed
Watch from 0:00 to 1:25 to learn how to set up your device.
For detailed information about the mask, refer to the mask user guide. Recommended masks are available from the manufacturer.